*Announcement, announcement, there is an announcement going on*
I will be traveling tomorrow and over the weekend, so I won't have an interactive Friday this week. Instead I decided to do a tutorial... for the very first time! This means this post will be extra long and picture heavy, proceed with caution.
Also, I'll be swearing in as a U.S. citizen tomorrow, I figured it was about time I became an American, so we are pretty psyched about that, it has been a long road filled with forms, tests and a lot of driving and waiting around offices, so tomorrow will be a very special day.
After we are done we will be taking off to Orlando, finalizing paper work stuff and Andrei has surprised me with a flash visit to Walt Disney World in order to attend Mickey's Not So Scary Halloween Party as a celebration for this milestone.
And now, back to what I drew and made today:
At some point my friend Becky asked on twitter for suggestions of what she could wear to Epcot's 30th anniversary celebration on Monday. I suggested a figment purse, but then when I got home and sat down to draw I looked over at a small plushy of figment I keep wrapped around my flexo lamp and had this idea:
 |
| Figment Hat Concept Sketch - blue and mechanical pencil on plain Moleskine notebook. Aprox 5 mins. |
A little back story about the hats: I made these cute little hats for my mom, cousins and best friend when they came to our Disney Wedding. Like a crazy magpie (again), I bought tons of materials which I have kept, so I pulled some stuff and started to brainstorm.
Want to make your own? Well, hopefully my directions can help along.
First, materials:
 |
| I had stick-on felt, normal felt, 2 pieces of letter sized construction paper, scissors, assorted ribbon and shiny scrapbooking embellishments, a glass with a peculiar shape and some silk flowers. |
First, mark a piece of construction paper, my glass has a smaller base than rim, the very first time I did the hats I didn't know what I was going to do and tried to eye it out... it wasn't pretty, it was then that I saw this glass on our cupboard and used it as my guide:
 |
| Marking the bottom and then the rim. |
 |
| Ta-dah! You don't need a glass, essentially all you need are 2 small circles, the smaller one will be the lid of the hat and the bottom will be the brim. |
After marking the top and brim of my hat I wrapped another piece of construction paper around the glass and figured how tall the glass was and marked and cut a rectangle out of the cardboard to form the main body of the hat.
 |
| You should have 3 pieces, the brim (I cut a whole the size of the top of the hat inside of said brim), the lid of the hat and finally the rectangle for the body. |
You will make a cylinder with the rectangle:
 |
| Don't try and make a perfect roll, Remember how the glass flared out? Well, you want your body to do the same. |
Pass the body through the hole of the brim, play around with the shape of the body, adjust it as you would like.
This is what my preferred shaped looked like:
 |
| Starting to look like a hat! Or a teacup... or a teacup hat! |
Next I used the lid to make the top opening of my hat a little bigger, you want to be as close to the lid as you can, it will make things easier later. Do leave some of the lid hanging over the front of your hat, you will see why soon:
Since Figment is mostly purple I used 2 letter sized pieces of stick-on felt. I like to use this kind of felt on tiny hats because it is more stiff and easier to deal with than the floppy normal felt. You can find this felt anywhere, from Walmart to Michaels and it is very cheap.
 |
| See? It sticks! |
I cut a piece of the felt to match my body pattern
Then I stuck the felt onto the construction paper (if you are planning on making more than one hat, copy the pattern pieces onto a blank piece of construction paper so you don't have to re-measure things).
After I did that I carefully made the body of the hat into a cylinder again and started to play with ideas with ribbons I had left over.
 |
| I barely had enough orange ribbon, but it went around. Hooray! |
After trying that out I became convinced that the brim had to be pink, so I cut a brim out of another letter sized piece of stick-on felt on pink:
Just punch through and cut out the center hole.
I then cut another round piece, the same diameter as the brim, but didn't cut out the hole on the middle, leave it like that, trust me.
 |
| The 2 pieces of the brim. |
I tried that out and didn't quite like it, too pink. My stuffed Figment wasn't pleased either.
 |
| Naaaaah, no good. |
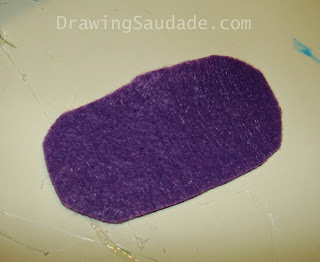
So, I cut two brim pieces out of the second piece of purple felt. I liked it much better.
 |
| Yessss. |
I then picked a contrasting ribbon to go with the orange ribbon I had already picked for the hat.
Using the hot glue gun I glued the back of the body together:
 |
| It is perfectly fine for it to look like this, it gives it a very cool shape and flare. |
To glue the brim down just hold the hat upside down and hotglue the bejeezus out of the place where the body and brim meet, don't worry if it looks ugly, we'll fix it.
 |
| Sorry about my bad manicure, I had great TARDIS colored nails and after a week of work, etc I haven't had time to paint them again. Ugh. |
Let the glue cool off and then turn your hat right side up.
Note: I added wings to this puppy and on hindsight I should have FIRST put the wings in and then added the lid, so yeah, if you add wings, do that first, then this step hmmmkay?
To glue the lid to the top of your hat line the top of your hat with a small, very hot line of glue:
 |
| Patience and a steady hand help... unfortunately for me I have neither of those, much swearing and burning of finger tips ensued. |
Peel the film away from your stick on top and place over the hot glue:
 |
| Press for a bit and let glue cool. |
Turn the hat upside down again, cut notches on the part of the cylinder that is sticking out of the brim at the bottom and then cut the notches down. Leave a tiny bit of a lip sticking out, this will keep your body and brim together:
 |
| Notches! |
Now, to fix the mess: peel the protective film from the sticky side of the felt on the brim and then place the section of the brim without a whole on top of it:
 |
| Now you see the mess... |
 |
| Now you don't! |
And so, you will have hat ready for decorations!
 |
| It will still be rough around the edges, but don't worry, we'll make it better. |
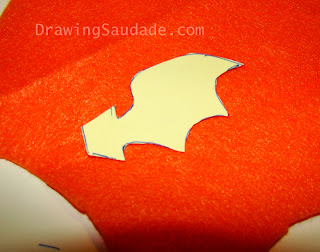
Figment has little orange dragon wings, so I drew some on a piece of construction paper, the color doesn't matter, we will cover it up anyway:
 |
| Wiiings, the box the wing is sticking to helped me visualize the way they would stick on the hat. |
With an xcacto knife cut a slit on the side of the hat, do not make it long, leave it short so you can wedge the wing in.
Copy the pattern and cut another wing, I eyed the position, you can use a ruler if you want... I was rushing, so I didn't.
 |
| yay! |
As you can see I made small notches on the pattern for my wings, I folded the notches in so once I slipped it into the slits the wing would stay put. Use the wing patter to cut out some more felt.
I didn't have stick-on orange felt, so I had to make do with some floppy orange felt I had:
Repeat the pattern four times, you will have to stick one piece of felt to each side of both wings:
 |
| Weee! |
Place the wings on the slits and using a small bit of hot glue, secure them to the body. Like I said before, leave the lid of the hat off and you can glue the wings to the inside of the body where it doesn't matter if it is messy or not.
 |
| It sorta liiiives! |
I secured the orange ribbon around the hat and made the ends meet on the back. I used a left-over flower to cover the seam of the ribbon ends:
With lots of care and little by little, cut the excess of the lid that might be hanging over the body of the hat, then carefully make a sliver of a line of hot glue around the top and cover the imperfection with the contrasting ribbon. Do the same on the brim.
I then just added some random scrapbooking embellishments and voila!
Final steps: Get a plain, cheap headband (I still had a bunch, and I was lucky because I found an orange one! Woot!
Make a small notch on the bottom of the hat, this will allow the headband to mesh better into the hat.
Cut some floppy felt on the same color of the bottom of the brim to help glue the headband to the hat:
Place the hat slightly off-kilter, or straight on, your call, on the headband:
Using hot glue, glue the bottom of the headband to the hat and the felt to the headband AND the hat. This will keep things in place and make the hat easy to wear.
And so, here it is: A figment hat in less than 2 and a half hours!
OK I am exhausted now, gotta go clean my mess and get ready for tomorrow.


