Showing posts with label Disney. Show all posts

Tuesday, November 13, 2012

Doodle 105 - A Brave Evening

Not much to report today, but, can you guess what movie are we watching today?

Yay! The snacks are here! - blue mechanical pencil and graphite on plain Moleskine notebook. Aprox 10 mins.
As a side note... OMG, where did the year go?! Is anybody else a bit freaked out by the fact that Thanksgiving is just nearly literally around the corner?

Don't get me wrong, I am looking forward to it, specially since this year we will be going to the home of awesome friends and having an all American holiday (it is normally just Andrei and I and he never quite celebrated T-Day and I never even knew about T-Day until I moved here, so we kinda lack on that festive tradition), so it should be a blast, and yes we will even indulge in some black Friday shopping, that we can do well, we are awesomesauce at bargain hunting LOL.

Anyway, to all my American readers/friends, good luck with the preparations toward the holiday, are you traveling? Staying at home? Hosting a dinner?

To all my international readers, are we looking forward for the rest of the Holidays coming up in December?

I know one of my neighbours really is... they put up their Christmas decor the moment they took down the Halloween ones, that there is being pro-active... or overachieving ;)

Friday, November 9, 2012

Doodle 101 - Paperman Vynilmation Concept

I am so excited! We have a 3 day weekend here in the US, this means I get more time to draw and create plus more time with Andrei, that's always a plus.

People always comment how quirky it is that we never seem to get tired of each other's company, and to be sincere, even to us it is a thing of wonder.

When we began our relationship we were a world away from each other, we longed to be able to see each other face to face, at the very least be able to hold hands, so when we finally were together you could imagine we became inseparable.

Still, when we are together we are not lovey dovey, so much so that waiters always ask if we are going to pay together and people that don't know us assume we are just great friends, a fact that makes me chuckle every time.

What can I say, I am not into PDA, it comes from being shy I guess, but I somehow like to leave our more lovey side to ourselves.

After what happened all those years ago, we became even more inseparable, so much so that people will always act surprised if we show up to social events without the other and act worried, sort of as if we were missing a limb.

We have lunch together every single day, unless we have meetings or work related delays. Still, I like to spend some time alone, and my drawing time is indeed "me" time, plus sometimes I send Andrei to do the grocery shopping while I, in exchange, clean the house. He doesn't like to be away from me, but I was a loner before I met him and I like my space on time to time.

Plus we keep our work and work functions to ourselves, so you could say, we don't spend every hour of the day together, just an apparent insane amount of time side by side, and yet, it never feels like enough in the end.

I guess that once you have nearly lost the person you love the most in the world you realize that every moment spent together is as precious as any other, even when all you do is sit on the couch reading books.

Well... that was totally unrelated to today's doodle, well a bit unrelated anyway.

I have this large white vynilmation by my desk begging to be painted, at first I was going to try something candy related, then I thought maybe Mary Poppins, but after watching Paperman, I decided there was one thing I wanted to paint, today I sat down and did a quick sketch to start the process:
Paperman vynilmation concept (front) - green, red and black mechanical pencil on plain Moleskine notebook. Aprox 15 mins

Paperman vynilmation concept (back) - green, red and black mechanical pencil on plain Moleskine notebook. Aprox 15 mins
 Be on the lookout as I work on this project for the next weeks ahead.

Also, remember this Friday's interactive theme, you can see it here.

And lastly, check the giveaway contest, you have until Sunday night to enter, for rules, etc go here.

Monday, November 5, 2012

Doodle 097 - Fantasyland

One of the perks of living so close to Disney World is that we can attend special events and previews like the one we were lucky to get into this past weekend.

You had a small taste of what we saw, and as promised, I have more photos to share today, not too many though.

We toured the new "Be Our Guest" restaurant, my indoor photos didn't really turn out, but I have a few of my favorites from the outside theming:

Detail of lampost outside of the Beast's Castle

Mural over the main door for the "Be Our Guest" restaurant.

Gargoyles guarding the door.

The one indoor photo that turned up: (I need a better camera)
Mural inside the "Be Our Guest" restaurant.
 We also had the chance to ride the new Little Mermaid ride, the theming inside it was wonderful, and the ride itself super cute:
"Voyage of The Little Mermaid" - Prince Eric's castle... I want an apartment up there, so-very-badly.

Main entrance for the ride.
Sea slug light fixture inside the line of Ariel's Grotto.

 And finally we stopped by Gaston's Tavern right before eating lunch at "Be Our Guest" restaurant.
Gaston statue.

The man himself.


One of my favorite paintings inside the "Be Our Guest" restaurant.
 The new expansion is amazing, I can truly appreciate all the work that went into it, the attention to detail is breathtaking, you really do feel as if you were inside the movies themselves, if you can ever visit, I'd highly recommend it.

Finally, I did a quick doodle for today:
Priestess - Graphite and mechanical pencil on plain Moleskine notebook. Aprox 10 mins.
And as a closing note for the day: I added new pieces on my redbubble store (I added a link on the navigation bar for your convenience), some of you have already placed orders, and for that I want to express how grateful I am for your support, you guys never cease to amaze me.

Saturday, October 20, 2012

Doodle 081 - Jellyfish Racer

We watched Wreck It Ralph this morning after playing video games at Disney Quest, it was a blast!

I recommend the movie, it is fun, cute and at times very, very sweet.

I wore my hair candy today and got a ton of compliments, so that was a success.

We also got to see a bit of the Orlando dragon boat races and now I sorta want to put a team together... mostly so I can be the one playing the drums to keep the rowing pace LOL.

I drew the following character inspired by the Sugar Rush game and the Nemo pool at the Art of Animation resort.

I doodled the basic structure tonight after having a swim and finished it after dinner.

I'm also attaching a photo of Andrei playing Fix It Felix, the arcade game from the movie, a Wreck It Ralph cupcake and a photo of the dragon boats.


Thursday, October 18, 2012

Doodle 079 - Vanellope von Schweetz candy hair ornament tutorial and female Captain America

Tomorrow after work Andrei and I will be hitting the road to visit Walt Disney World and attend a special screening of Wreck It Ralph. This means there won't be an interactive Friday this week.

Also I said I was going to post a tutorial tomorrow, but then I figured I'll be running around like a chicken without a head all day tomorrow and I decided to post it today instead. Hooray!

This craft is actually super easy, I decided to do it once I got confirmation that we would attend the screening, also I am a big dork, but that goes without saying.

Vanellope is a character in the movie, she is part of a game called Sugar Rush, the game takes place in a world that looks a lot like Candy Land, all the characters sport clothing that is made out of candy... well pretty much everything is made out of candy, and Vanellope's hair happens to be sprinkled with gummy bears, peppermints and... sprinkles:

Vanellope shaking hands with Ralph - Disney
My hair is pretty dark too, so I decided it would be fun to wear some sprinkles on my hair Saturday for the movie, it is a bob at the moment, so the pony tail with the Twizzler scrunchy is off though.

For the madness to begin all you'll need are:

-A hot glue gun (and glue sticks for it)
-Short or long bobby pins (depends on your hair length) that match your hair color more or less.
-Hair clips (also close to your hair color)
-Small beads or ornaments that look like candy.

When I decided to go on ahead and try to do this, the first place I hit up to find "candy" was Michaels. It is super close to my office, so I went over there on my lunch hour with Andrei and I found these:

Peppermint bead ornaments from Michaels. A bit over $2 after coupon, yay!
They are starting to roll out all the Christmas decor, so if you want peppermints and candy canes that are small enough for hair ornaments I would go now and stock up. These peppermints are an inch in diameter, perfect!

After work we had to do some shopping at Walmart, and in their kid's craft section, I found these on clearance:

Foam Beads.
At first they looked like they might not work since they have these designs printed on them, but they had a blank side, plus foam is super light, so they wouldn't be uncomfortable to wear or weight my hair down, plus they are all less than one inch, perfect size for sprinkles.

I also picked up some hair clips and bobby pins while there, nothing fancy, the cheapest I could find on black.

I was worried the candy ornaments would be difficult to separate from the hooks they came on, but it was actually just question of a simple twist and pull and I had all of them off without even getting the hooks off the package:

Yay candy!
These had a lot of tiny transparent beads glue to them, it gave them a cool frosted effect, but the beads kept coming off, I rubbed them with my fingers to get the excess out and to totally get them off one of the sides of the ornaments so they would stick well to the hair clips I was using.

Candy on hair clip test.
After that I opened the pack of foam beads and looked at the shapes and colors available:

The blank side was perfect.
Then I tested them on long bobby pins, the beads have a small hole through them already, so all you have to do is skewered them with the bobby pins. A small drop of hot glue does help keep them in place:


The long bobby pins were too much for my short hair, so I tried shorter ones I had already:

 
Once I had figured how I wanted to place the beads and ornaments I broke out the hot glue gun and did the last part of this super quick craft:

Before.
After: 3 minutes later... done!
Yup, just a bead of hot glue on the pins and clips will keep everything in place.

And then all you do is randomly place the candy all over your hair (after the glue has cooled off and dried, of course):

Sorry bout the bad photos, bad light, plus camera phone, plus me being lazy equals... photographic mess.

Anyway, They do look better in person and like candy, so I am pretty excited to wear them on Saturday.

Now for today's doodle. I did a quick female version of Captain America... I don't know why, I just did LOL:

Female Captain America. - graphite and mechanical pencil on plain Moleskine notebook. Aprox 15 mins.

Wednesday, October 17, 2012

Doodle 078 - Waiting room doodle and Vanellope von Schweetz

Ah! I am so late posting today, I ended up having to go the urgent care clinic, don't worry I am ok, just started to feel sick and I ended up needing some meds.

The good news? It isn't anything major.
The bad news? I had little time to draw today, but I tried my best anyway.

This first doodle I actually did on my tiny notebook while waiting at the doc's office:

Walking the wire - mechanical pencil on plain Moleskine notebook. Aprox 10 mins.
It is shaky and rough, but I was holding the notebook in one hand and the pencil on another, plus I was feeling rather sick (still am), so I am actually surprised it looks like anything.

Once I was released from the doc's office and got home I decided I needed to draw at least one other thing.

Andrei and I are going down to Disney World again this weekend, I scored us spots to go see Wreck It Ralph via the Disney Parks Blog and then I got extra lucky and got a room at the new Art of Animation Resort, so as you can guess, I am very excited for the weekend.

And so, I drew this:

Vanellope von Schweetz - graphite and pencil on plain Moleskine notebook. Aprox 5 mins.
It is Vanellope! She is one of the characters on the Wreck It Ralph movie, and the inspiration for a small tutorial I'll be sharing on Friday, since I'll be hitting the road and not going to have time to do an interactive Friday this week.

OK I am off to bed now, I am exhausted, but I am determined, not a single day without a doodle.

Sunday, October 7, 2012

Doodle 068 - Interactive Friday Animation Doodles (part 2)

I had my work cout-out for me today. All of you suggested characters are from some of my very favorite animated movies, so it was a ton of fun to keep on drawing and studying.

To be sincere, I ran out of time and I still wanted to finish the long list of suggestions for the weekend... blame it all on Skyrim, I decided I wanted to finish "one" quest and ended up finishing 3 or 4 instead... it never fails... damn you Skyrim! *shakes fist*

Anyway, here are today's requests:

 Marebabe: "How about Sebastian (the red crab) from Disney's "The Little Mermaid"?"

Sebastian from character sheet and photo references - non-photo blue and mechanical pencil on plain Moleskine notebook. Aprox 15 mins.
 He looks so happy, probably singing "Under the Sea".

Next up, Susanna King: "Would you be willing to take a stab at the unicorn from The Last Unicorn? It's my favorite animated movie, and I think the animation style matches your drawing style."

It is one of my favorites too!

The Last Unicorn from photo reference - non-photo blue and mechanical pencil. Aprox 15 mins.

Andrea:  "How about Sulley and Mike from Monsters, INC?"
This was a tough one, Sully was easy, but for some reason Mike came out all wonky.

Mike and Sully from photo reference - non-photo blue and mechanical pencil. Aprox 25 mins.
 Aleksandra Robinson: "What about Totoro or the Catbus? Miyazaki is definitely one of the masters. :D"

Miyazaki is indeed a master, I am a huge fan of his, and the cat bus is one of my favorite things in the world.

Catbus from movie still - non-photo blue and mechanical pencil. Aprox 20 mins.
 I had to draw him while sprinting about. I also drew a quick Totoro:

Totoro from photo reference - non-photo blue and mechanical pencil. Aprox 10 mins.


charissa:  "Any of the cats from The Aristocats!"

Sure thing! I drew Duchess and Marie:
 

Duchess and Marie from character sheet references - non-photo blue and mechanical pencil. Aprox 15 mins.
 That does it for today, I might pick up the rest of suggestion tomorrow or during the week. Thanks for playing along for yet another week, I really enjoy waiting to see what you guys have come up with for me to draw and then putting some effort on the weekend drawings.

Saturday, October 6, 2012

Doodle 067 - Interactive Friday Animation Doodles

Wow, so many awesome suggestions from everybody, you guys absolutely rock.

I was outside for a long time today, it was very hot, but we had fun and ended up going to watch Frankenweenie. We pretty much had the whole IMAX theater for ourselves, which was awesome. The movie itself is hilarious, perfect for the Halloween season as well, I highly recommend it... also I was so happy that they had a trailer for The Hobbit at the beginning, I am def. going to the midnight showing for that movie!

Anyway, since I was out most of the day I only got to three drawings, but tomorrow I'll probably work on way more. In order to draw these I did a lot of research and found a bunch of character development sheets for Cinderella, I love those, it helps me figure out the structure much faster.

I wasn't so lucky with Geri and Fiona, but I made do:

Heather T.: "Cinderella - more in the style of the original movie, not the "prettied up" version Disney promotes now (she wasn't a blonde!!)"

You know, Andrei said the same thing while watching the movie the other day lol.

Cinderella Sketch from development sketch reference - non-photo blue and mechanical pencil. Aprox 15 mins.
 I went ahead and drew her in the outfit the mice and birds did using her mom's old dress :)

Anonymous said: "Could you please draw Geri from Geri's Game (animated Pixar short)? He was my first ever FAVE-orite animated character :)"

That's so cool, I never would have thought of drawing him, after a lot of googling... hehehe, I ended up with this:
Geri from reference screen caption - non-photo blue and mechanical pencil. Aprox 15 mins.
 And finally for today, Anonymous#2: "Fiona! You want strong female characters, well, who's better than Fiona? Take THAT, rescued princess stereotype!"

Right on! I even went ahead and drew her on her warrior outfit.

Fiona from photo reference - non-photo blue and mechanical pencil. Aprox 15 mins
OK I am off to play some video games and rest, tomorrow... I DRAW!

Sunday, September 30, 2012

Doodle 061 - Cat, Mushu and Twilight Sparkle again

Ah, back home again, I love going away, but I always miss my own bed and pillows the most. I had an awesome weekend, visited my happy place (The Magic Kingdom), and the best part was meeting up with good friends.

I am a loner and rather awkward, so, sometimes I forget how very nice it is to be among friends and just talk, have fun and catch up.

Another good thing about being home, is that I get to draw at my desk with decent light again hehehe, so today after eating dinner and resting for a bit I went on a bit of a drawing rampage.

First I did a quick warm-up doodle of my cat, Garfield, he loves Andrei over every other thing in the world, so when he left to pick up some Chinese for dinner he just decided to guard the door until he returned. He really misses him when we go on a trip, even if it is only the weekend:

Waiting - Blue and mechanical pencil om plain Moleskine notebook. Aprox 3 mins.
After dinner I started trying to figure out how to draw Mushu from Mulan, after some adjustments using the blue pencil I figured it out and came up with these:

Mushu, front and profile views from model sheet reference - Blue and mechanical pencil on plain Moleskine notebook. Aprox 15 and 7 mins.
After I got the basics down I tried to do one of his expressions:

Mushu from model sheet reference - Blue and mechanical pencil on plain Moleskine notebook. Aprox 5 mins.
Mushu was a lot of fun to draw, I should try a full body drawing next time.

After Mushu I drew Twilight Sparkle again... because I was still bothered by the fact that I forgot her horn last Friday:

"She forgot my unicorn horn?!" - Blue and mechanical pencil on plain Moleskine Notebook. Aprox 10 mins.
Hehehe she is shocked, and rightfully so, sorry Twilight!

So, that's it for this month, October is here, yay!!! I am so happy that Halloween is so close. I am also very proud of myself for not skipping a single day so far, even when I was on the road for quite a bit. I have to credit the extra push to stay at it to all of you, whenever I feel like just turning in for the day I remember you guys are here and that keeps me honest lol.

2 months down, 10 to go!

Friday, September 28, 2012

Doodle 059 - Twilight Sparkle and Disney kind of Halloween

I'm posting this live during a food break at Magic Kingdom's Mickey Not So Scary party.

Since I'm on my phone this post won't be long and the photos will probably attach themselves as they will please, so bear with me.

Todays doodle is Twilight Sparkle, I'm dressed at her tonight.

I drew her in the near dark, so please excuse the mess LOL

Update: Andrei pointed out I forgot Twilight's unicorn horn... Duh! I did draw it on my initial blue outline and then totally forgot to put it down on black. LOL


Thursday, September 27, 2012

Doodle 058 - Simba

Wow, what a day, well I'm now officially a citizen of the USA, yay!

We have been running around all day doing paperwork and then on the road to Orlando.

I just doodled a quick Simba after dinner since I'm staying at Disney World and The Lion King soundtrack is playing.

This is my first time drawing him, so here it goes:


Wednesday, September 26, 2012

Doodle 57 - Figment Inspired Hat Tutorial and Doodle

*Announcement, announcement, there is an announcement going on*

I will be traveling tomorrow and over the weekend, so I won't have an interactive Friday this week. Instead I decided to do a tutorial... for the very first time! This means this post will be extra long and picture heavy, proceed with caution.

Also, I'll be swearing in as a U.S. citizen tomorrow, I figured it was about time I became an American, so we are pretty psyched about that, it has been a long road filled with forms, tests and a lot of driving and waiting around offices, so tomorrow will be a very special day.

After we are done we will be taking off to Orlando, finalizing paper work stuff and Andrei has surprised me with a flash visit to Walt Disney World in order to attend Mickey's Not So Scary Halloween Party as a celebration for this milestone.

And now, back to what I drew and made today:

At some point my friend Becky asked on twitter for suggestions of what she could wear to Epcot's 30th anniversary celebration on Monday. I suggested a figment purse, but then when I got home and sat down to draw I looked over at a small plushy of figment I keep wrapped around my flexo lamp and had this idea:

Figment Hat Concept Sketch - blue and mechanical pencil on plain Moleskine notebook. Aprox 5 mins.
A little back story about the hats: I made these cute little hats for my mom, cousins and best friend when they came to our Disney Wedding. Like a crazy magpie (again), I bought tons of materials which I have kept, so I pulled some stuff and started to brainstorm.

Want to make your own? Well, hopefully my directions can help along.

First, materials:

I had stick-on felt, normal felt, 2 pieces of letter sized construction paper, scissors, assorted ribbon and shiny scrapbooking embellishments, a glass with a peculiar shape and some silk flowers.
 First, mark a piece of construction paper, my glass has a smaller base than rim, the very first time I did the hats I didn't know what I was going to do and tried to eye it out... it wasn't pretty, it was then that I saw this glass on our cupboard and used it as my guide:

Marking the bottom and then the rim.

Ta-dah! You don't need a glass, essentially all you need are 2 small circles, the smaller one will be the lid of the hat and the bottom will be the brim.
 After marking the top and brim of my hat I wrapped another piece of construction paper around the glass and figured how tall the glass was and marked and cut a rectangle out of the cardboard to form the main body of the hat.

You should have 3 pieces, the brim (I cut a whole the size of the top of the hat inside of said brim), the lid of the hat and finally the rectangle for the body.
 You will make a cylinder with the rectangle:

Don't try and make a perfect roll, Remember how the glass flared out? Well, you want your body to do the same.
 Pass the body through the hole of the brim, play around with the shape of the body, adjust it as you would like.

This is what my preferred shaped looked like:

Starting to look like a hat! Or a teacup... or a teacup hat!
 Next I used the lid to make the top opening of my hat a little bigger, you want to be as close to the lid as you can, it will make things easier later. Do leave some of the lid hanging over the front of your hat, you will see why soon:


Since Figment is mostly purple I used 2 letter sized pieces of stick-on felt. I like to use this kind of felt on tiny hats because it is more stiff and easier to deal with than the floppy normal felt. You can find this felt anywhere, from Walmart to Michaels and it is very cheap.

See? It sticks!
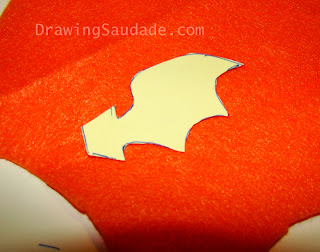
 I cut a piece of the felt to match my body pattern


Then I stuck the felt onto the construction paper (if you are planning on making more than one hat, copy the pattern pieces onto a blank piece of construction paper so you don't have to re-measure things).

After I did that I carefully made the body of the hat into a cylinder again and started to play with ideas with ribbons I had left over.

I barely had enough orange ribbon, but it went around. Hooray!
 After trying that out I became convinced that the brim had to be pink, so I cut a brim out of another letter sized piece of stick-on  felt on pink:


Just punch through and cut out the center hole.


 I then cut another round piece, the same diameter as the brim, but didn't cut out the hole on the middle, leave it like that, trust me.

The 2 pieces of the brim.
I tried that out and didn't quite like it, too pink. My stuffed Figment wasn't pleased either.

Naaaaah, no good.
 So, I cut two brim pieces out of the second piece of purple felt. I liked it much better.

Yessss.
 I then picked a contrasting ribbon to go with the orange ribbon I had already picked for the hat.


 Using the hot glue gun I glued the back of the body together:

It is perfectly fine for it to look like this, it gives it a very cool shape and flare.
 To glue the brim down just hold the hat upside down and hotglue the bejeezus out of the place where the body and brim meet, don't worry if it looks ugly, we'll fix it.

Sorry about my bad manicure, I had great TARDIS colored nails and after a week of work, etc I haven't had time to paint them again. Ugh.
 Let the glue cool off and then turn your hat right side up.

Note: I added wings to this puppy and on hindsight I should have FIRST put the wings in and then added the lid, so yeah, if you add wings, do that first, then this step hmmmkay?

To glue the lid to the top of your hat line the top of your hat with a small, very hot line of glue:

Patience and a steady hand help... unfortunately for me I have neither of those, much swearing and burning of finger tips ensued.
 Peel the film away from your stick on top and place over the hot glue:


Press for a bit and let glue cool.
Turn the hat upside down again, cut notches on the part of the cylinder that is sticking out of the brim at the bottom and then cut the notches down. Leave a tiny bit of a lip sticking out, this will keep your body and brim together:

Notches!
Now, to fix the mess: peel the protective film from the sticky side of the felt on the brim and then place the section of the brim without a whole on top of it:

Now you see the mess...
Now you don't!
 And so, you will have hat ready for decorations!

It will still be rough around the edges, but don't worry, we'll make it better.
 Figment has little orange dragon wings, so I drew some on a piece of construction paper, the color doesn't matter, we will cover it up anyway:

Wiiings, the box the wing is sticking to helped me visualize the way they would stick on the hat.
 With an xcacto knife cut a slit on the side of the hat, do not make it long, leave it short so you can wedge the wing in.

Copy the pattern and cut another wing, I eyed the position, you can use a ruler if you want... I was rushing, so I didn't.
yay!
 As you can see I made small notches on the pattern for my wings, I folded the notches in so once I slipped it into the slits the wing would stay put. Use the wing patter to cut out some more felt.

I didn't have stick-on orange felt, so I had to make do with some floppy orange felt I had:


Repeat the pattern four times, you will have to stick one piece of felt to each side of both wings:

Weee!
 Place the wings on the slits and using a small bit of hot glue, secure them to the body. Like I said before, leave the lid of the hat off and you can glue the wings to the inside of the body where it doesn't matter if it is messy or not.
It sorta liiiives!
 I secured the orange ribbon around the hat and made the ends meet on the back. I used a left-over flower to cover the seam of the ribbon ends:


With lots of care and little by little, cut the excess of the lid that might be hanging over the body of the hat, then carefully make a sliver of a line of hot glue around the top and cover the imperfection with the contrasting ribbon. Do the same on the brim.

I then just added some random scrapbooking embellishments and voila!


Final steps: Get a plain, cheap headband (I still had a bunch, and I was lucky because I found an orange one! Woot!

Make a small notch on the bottom of the hat, this will allow the headband to mesh better into the hat.


Cut some floppy felt on the same color of the bottom of the brim to help glue the headband to the hat:


Place the hat slightly off-kilter, or straight on, your call, on the headband:


Using hot glue, glue the bottom of the headband to the hat and the felt to the headband AND the hat. This will keep things in place and make the hat easy to wear.


And so, here it is: A figment hat in less than 2 and a half hours!

OK I am exhausted now, gotta go clean my mess and get ready for tomorrow.